Background
As a case in point, I recently returned a Netgear R6900 to Costco, because I had to restart it every 48 hours. To verify was not the only one, I did a Google search and found a forum entry of thousands of people that are having the same issue at https://community.netgear.com/t5/Nighthawk-WiFi-Routers/R7900P-dropping-internet-requiring-reset-every-few-days/td-p/1450152.
Having experienced so many issues, I decided to build my own physical router. It would not handle wireless traffic. It would only handle routing traffic from my home network to the Internet. Then, I would use my existing wireless routers purely as access points. They would connect wireless users to the network, but they would not handle any routing.
Hardware
They first step I took was to invest in a mini PC. I searched www.aliexpress.com for a good firewall-based computer. I wanted a computer that had four network cards. One would be used to connect the computer to the Internet. Another one would be dedicated for routing VPN traffic. The last two would be bridged, acting as a switch, and connected to my home network.
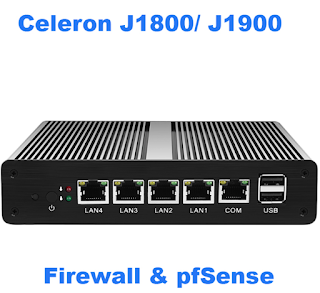
I searched www.aliexpress.com for mini PC and I found one that I liked. It contained a Celeron J1900 processor, 4 gigabytes of RAM, and a 32 gigabyte SSD hard disk. The total cost was $143. Since the description specifically mentioned pfSense, I figured it would be a perfect match for my usage requirements:
The computer shipped from Hong Kong. It took a little over a week to arrive. But, given that it was free shipping, I did not complain. I was very excited when it finally arrived.
Installing pfSense
When the PC arrived, I plugged it into a monitor using a VGA cable. I also plugged in a dongle for a wireless USB keyboard/mouse combo. I plugged one network card into my cable modem. Note that it is necessary to restart your cable modem whenever you plug new hardware into it. I plugged a second network card into a gigabit switch that was connected to my home network.
On an existing computer, I then used Rufus (https://rufus.ie/en_IE.html) to create a bootable flash drive with the pfSense installer. I downloaded pfSense from https://www.pfsense.org/download/. I chose the following options:
When I inserted the bootable USB drive into the computer, the computer booted into Windows. It was preloaded with Windows. To get the pfSense installer to load, I had to go to the BIOS and tell it to boot from the USB drive instead of the built in hard disk. Once I updated the BIOS, the pfSense installer loaded. I accepted the defaults and finished the installation. It went very quickly.

